Karcerr
Project Type
Mobile Kart Driving Game
Role
Solo Developer, Designer
Location
Burbank, CA
Engine
Unity
Other Software Used
Maya, Substance Suite (Designer And Painter), Houdini and Photoshop
A Bit About the game...
Karcerr is an open-world soapkart racing game for mobile phones, blending fast-paced racing with exploration. Players can freely roam a vibrant map, engage in thrilling races, drift with handbrakes, and activate boosts for speed bursts. The game offers dynamic weather that affects gameplay, adding variety to each race, and features a kart unlocking system, encouraging players to collect and upgrade unique vehicles. With intuitive controls and a seamless mix of racing and free driving, Karcerr delivers an exciting experience for casual and competitive players alike.
Gameplay Video
(the gameplay is captured on a mobile device,iPhone 12 Pro Max using Unity RemotePlay)
Role Description
In our Mobile Design Studio class, I decided to work on this project as a solo developer. I wanted to test my limits and measure the depth of my skills as a game designer. After getting the green light from my instructor and the project’s producer, I set out to bring my idea to life.
From the start, I was very clear about one thing: I wanted to create a kart racing game. Based on that foundation, I began fleshing out the core systems, mechanics, and gameplay loops before even opening the engine. Designing the systems on paper came naturally to me, and at that stage, everything seemed straightforward.
However, the real challenge began once I stepped into development. This was my first time building a game in Unity. While I had previously contributed to game design on Unity-based projects, I had never written a single line of code myself. That was exactly why I chose Unity for this project: I wanted to push myself beyond design and grow my technical abilities. Having some prior experience in Unreal Engine helped me grasp concepts more easily. Still, this project was my opportunity to truly learn, adapt, and develop hands-on skills as both a designer and developer.
Like every other project of mine, I have always maintained a clear focus on documentation not just as a record of progress, but as a tool for keeping every design decision and development milestone in sync. Even though this was a solo project, I treated it with the same level of organization and structure as a team production.
I documented everything from early design sketches, gameplay systems, and mechanic breakdowns, to iteration notes and reflections on what worked and what didn’t. This process allowed me to stay consistent with my vision while also tracking how each change impacted the overall experience. By the time I began implementing mechanics in Unity, I already had a well-structured design roadmap to guide development something that proved invaluable as a solo developer managing all aspects of the project.
Documentation
Karcerr Game Design Document
Karcerr Pitch Presentation
Prototyping
Rough Prototypes

A prototype track modeled in Maya

A prototype car modeled in Maya
As soon as I had a solid foundation for the design, I opened a new project in Unity and began scouring the internet for tutorials on creating a functioning car system.
I quickly modeled a basic track and a simple car blockout in Maya, then imported them into Unity. Following a few beginner-friendly tutorials, I created a simple movement script that made the car move forward and backward each frame when pressing the W and S keys.
Achieving this small milestone cemented my confidence the realization that building this game was indeed possible. It was just a matter of time, patience, and consistent effort.
Slowly and gradually, I began learning and implementing physics-based motion for the car, starting with Unity’s Wheel Colliders. These allowed me to tweak and fine-tune multiple driving parameters such as torque, suspension, friction, slip values, downforce, center of gravity, and wheel stiffness.
At first, I struggled with controlling the suspension, which caused the car to become extremely bouncy when landing from heights or drifting. However, after several sleepless nights of testing and iteration, I was finally able to develop stable solutions that made the car’s behavior feel grounded and responsive.
Prototyping
Physics Prototypes

Initial Wheel Colliders setup
Developement
World

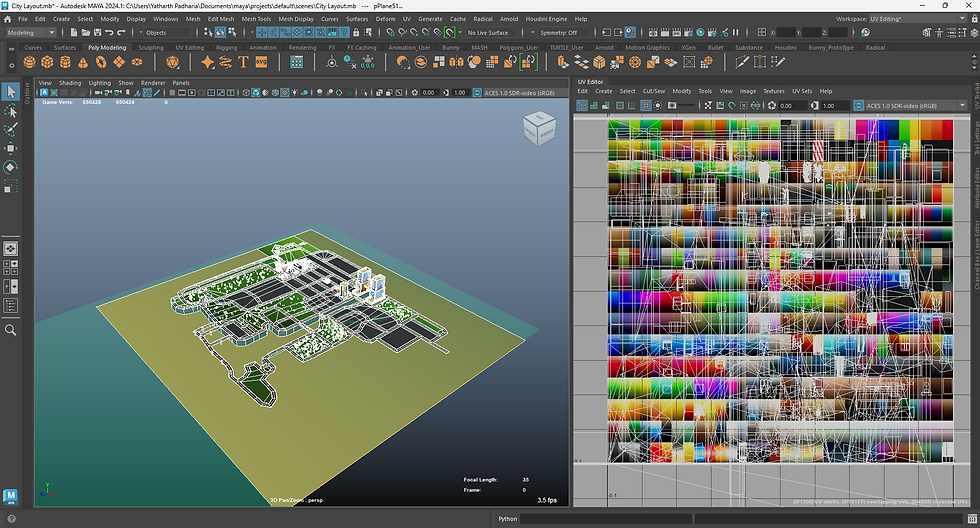
Final Sketch of the Level Layout.
Once I got the hang of the kart’s physics and controls, I began focusing on developing a level layout for the game. I wanted to create an open-world city environment that players could freely explore.
So, I started by sketching concepts and layout ideas for the city. My goal was to make a diverse layout that had city areas such as downtown, with residential areas with parks and apartment buildings for visuals. After finalizing a design that struck the right balance of complexity and navigational flow, I transitioned into the modeling phase, bringing the environment to life piece by piece.
Coding the AI for Rival Karts was one of the most challenging tasks I faced during development. Getting them to navigate the track correctly and behave believably turned out to be far more complex than I had anticipated.
My first objective was to create a script that defined the path the AI would follow. Initially, I designed a system where the AI would simply progress through an array of manually placed checkpoints. However, I quickly ran into an issue the AI would drive directly toward each checkpoint instead of naturally following the road’s curvature.
To fix this, I developed a spline-based pathing system, where the AI was required to follow a sequence of spline points instead of jumping straight to checkpoints. After running some tests, the AI karts began following the track smoothly a small but satisfying breakthrough.
However, another problem soon appeared. When the AI speed increased, the karts failed to slow down on turns, often flipping over during sharp corners. With the submission deadline approaching, I didn’t have time to create a fully dynamic driving model. So, I implemented a practical workaround for braking regions. Whenever an AI kart entered a box collider, it would automatically apply brakes for a short duration before accelerating again.
This simple yet effective solution made a huge difference in gameplay, giving the AI racers a more natural and competitive feel and allowing me to cross the finish line just in time.
AI Rivals

AI Splines

AI Brake Regions
Designing UI

Photoshop screenshot for the UI
As I had learnt from my previous projects, I understood how important it is to design a strong and functional UI for games. To begin the process, I opened up a fresh Photoshop file and started crafting the interface elements from scratch.
Complementing my vibrant and solid-colored art style, I wanted the UI icons to visually align with the same tone. I decided to go with a clean white base accented with vibrant colors, giving the interface both clarity and energy.
During playtesting, I discovered an interesting issue: the speedometer I initially designed was often covered by players’ palms while they were driving. To solve this, I decided to take a more immersive approach by placing the UI in 3D space behind the car. The speed indicator dynamically changed color; it stayed white when the car was accelerating, blue when boosting, and red when braking, making it both functional and visually engaging.
Another major UI element I focused on was the checkpoint markers placed throughout the world. I didn’t want them to feel like flat, static planes. I wanted them to feel alive and reactive. To achieve this, I decided to write custom shaders for the effect. However, since I was developing in the lowest rendering version of Unity for suitable for mobile devices, I didn’t have access to Shader Graph like in Unreal Engine or higher Unity pipelines. Despite this limitation, I relied on my knowledge of Unreal Engine shaders and basic HLSL coding to handcraft custom effects using HLSL, which added a distinct visual polish and personality to the game.
My primary focus while designing the controls for the game was to create a comfortable and accessible control system that required minimal finger movement for all players.
To achieve this, I designed simple and intuitive controls. The car could be controlled using two main buttons Acceleration and Braking while steering was handled by tilting the phone. This approach initially seemed ambitious, but after studying Unity’s documentation and several tutorials, it became entirely possible to implement.
Additionally, I added two secondary buttons: one for Boost and another for Handbrake. The Boost button was placed beside the Acceleration button, while the Handbrake button was positioned next to the Brake button a deliberate design choice to make them ergonomically accessible and easy to use during gameplay.
Finally, two utility buttons were included: a Pause Menu button to pause or exit the game, and a Reset Kart button to quickly reposition the vehicle back on track if it went off-road.
Designing Controls

Button Screen
Feedback

I was lucky enough to conduct playtests with my roommates and friends on my mobile phone using Unity Remote Play. From the very first session, I was proud to hear that they found the player controller smooth and easy to pick up. The car’s handling felt responsive and satisfying, especially the drifting mechanics, which made the little kart feel like a true race car.
However, I did receive some critical feedback regarding the AI Rivals. They didn’t feel challenging enough at times they moved too slowly, and occasionally they would tilt or flip over when attempting turns at high speed. This was an issue I had encountered earlier in development, but I’m happy to say that I eventually found a working solution to address it.
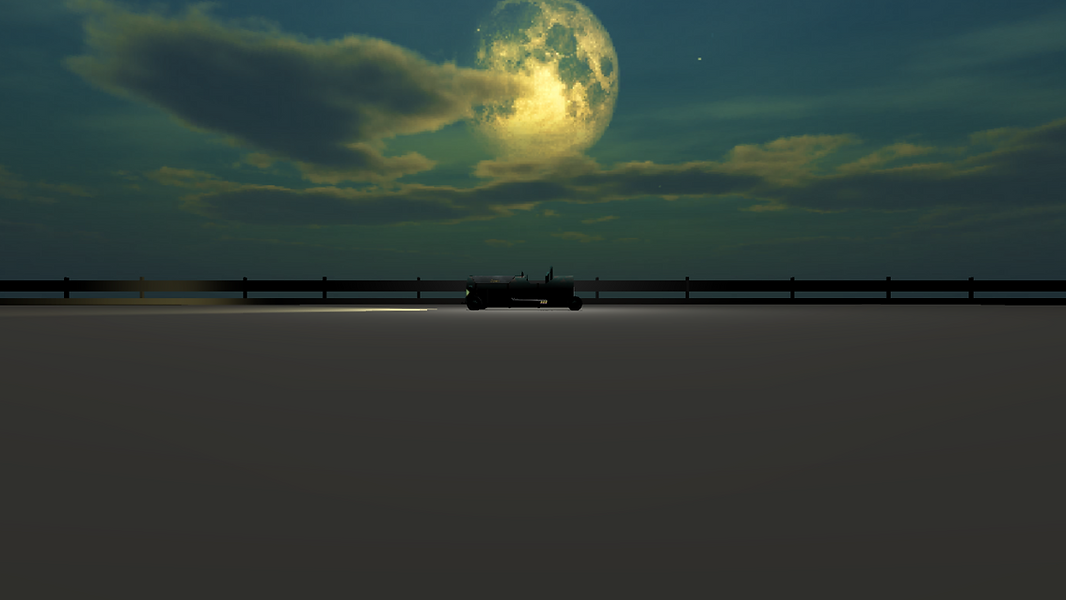
While I would consider this game to be the one I am most proud of where I achieved significant growth both technically and as a designer, I still believe there are several areas for improvement, one of the most notable being the incomplete art.
Due to the tight time constraints, I had to shift my focus toward other crucial aspects of the game, such as refining gameplay systems, polishing the AI behavior, and ensuring that the mechanics felt responsive and engaging. As a result, I fell short in completing the art for the level on time.
Because of this, the map currently feels empty, lacking the buildings and environmental infrastructure that were originally intended to bring the world to life. It remains one of the areas I’d like to revisit and enhance in future iterations of the project.
Post Mortem
What went wrong?
Incomplete Art

Modelling and Texturing
Modelling (Houdini)

Houdini Road System Generated
For modeling a complex road structure, I knew it would be a long and time-consuming task to complete entirely in Maya. So, I turned to SideFX Houdini, where I created a procedural system that allowed me to input custom-drawn curves and automatically generate a fully modeled road network complete with sidewalks and properly laid-out UVs to streamline the texturing process later on.
This curve-based workflow proved to be incredibly efficient, as it enabled me to quickly iterate and adjust the layout based on in-game testing. Instead of manually remodeling every road in Maya, Houdini saved a tremendous amount of time during both the design and iteration phases.
Houdini Curve - Road Tool
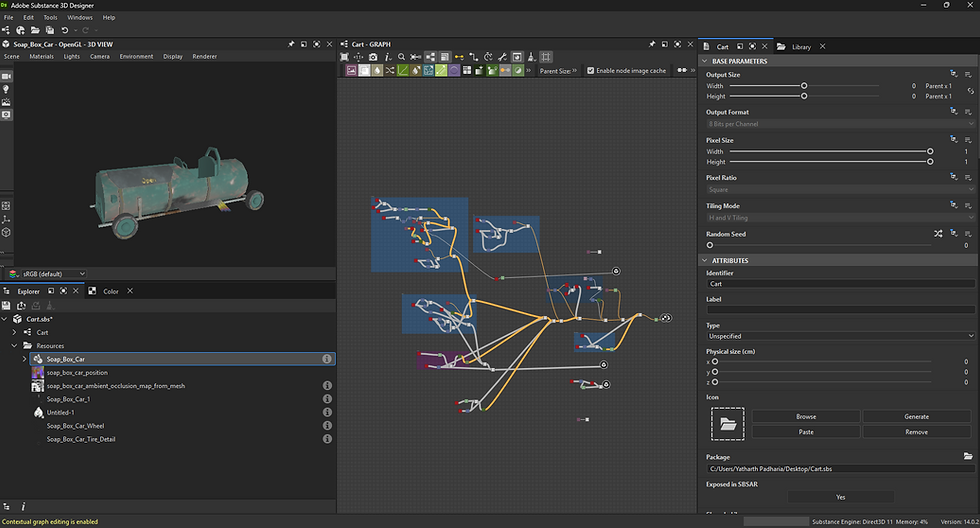
After modeling came the task of texturing, and keeping optimization in mind, I knew I couldn’t go overboard with detailed textures. Since the goal was to ensure the game ran smoothly on mobile devices, using multiple high-resolution textures would only increase memory load and potentially overheat or slow down performance.
To counter this, I decided to take a different approach. I used a colored texture atlas and began warping, stretching, and squashing UVs of my meshes to assign color directly from the atlas. This method not only allowed me to texture assets quickly and efficiently, but also gave the game a distinct visual style a gradient-based, stylized look that complemented the game’s aesthetic and performance needs perfectly.
Texturing

Color Texture Atlas (used to texture the city)
Click on one of the images to view the next project


Gallery


